It is no secret that photography is probably the most powerful selling tool in today’s internet age. We already know that over 90% of consumers admit to making a purchase decision based on a photo alone (guilty!). And here’s the thing, I hate to be the one to break it to ya, but no one ever created a strong recognizable brand with a tribe of loyal followers using generic, sterile, stock photos. So the stock photos, let’s stop using those today (kay?), and instead, follow along for my very best tips. tricks and advice for how you can take baller product photos for your business all by your amazing little self, using any device!
Step One: Lighting
A great photo has lots to do with your source of light.
- Natural light is the best. It will keep your colors mostly true to what they are. Artificial light can create color casting and unflattering shadows.
- Direct sunlight will cast unappealing dark shadows, creating difficult contrast in your photo (dark darks and bright brights).
- A flash will make your products look two dimensional.
- A bright, naturally lit area with diffused light is what you want. It might be in front of a large picture window, or outdoors in the open shade.

Step Two: Set-Up
- Find the biggest north-facing window in your home or shop. Look for where the light spills, this is your workspace!
- If you don’t have an abundance of natural light in your home or shop, consider stepping outside into the open shade.
- Procure some white reflective materials. This can be a roll of paper towel, a large piece of white bristol board or foam-core.
Step Three: Styling
- Gather materials that speak to your target audience, help tell the story of your product and also align with your brand colors (more on how to create your own brand guide here)
- Remember that less is more, you want to compliment your product, not take away from it.
- Leverage your shooting time: be sure to take a variety of images, from a variety of angles, with and without props.
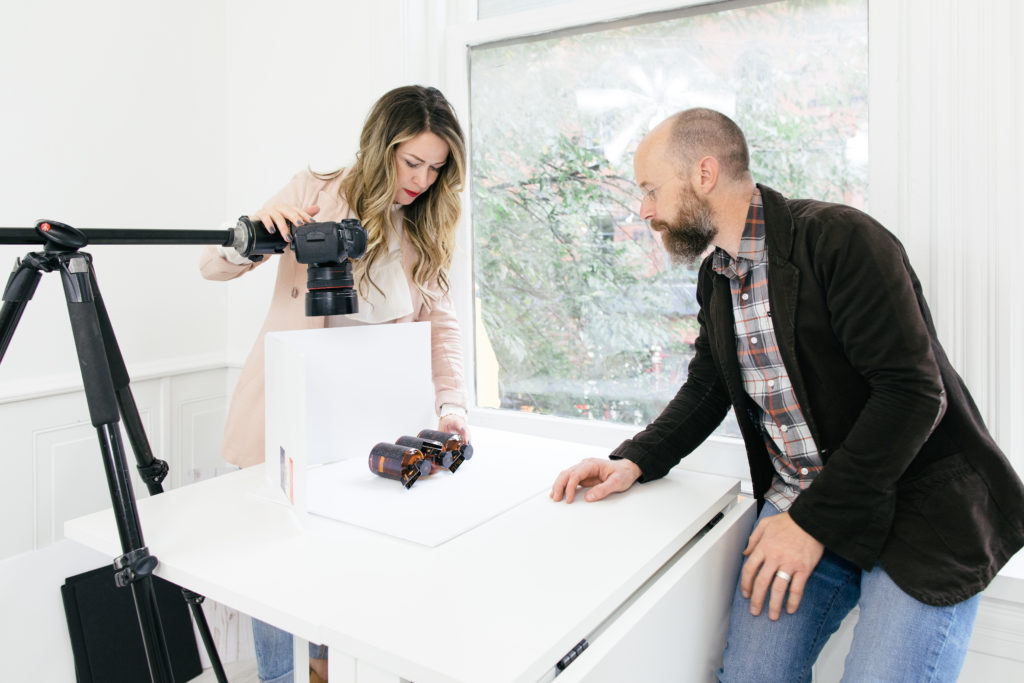
Step Four: Shooting
- Best to shoot inside, during the brightest time of day, away from direct sun.
- Clean your device/smartphone/DSLR camera
- If using a DSLR camera, I recommend using aperture priority. Set your aperture setting according to how many products you are photographing (one product, f1.8, two products f/2.8, three f3.5 and so on – more about manual DSLR camera settings here). Make sure your white balance and ISO are both set to ‘auto’
- For a crisp sharp clear image, it is very important to stabilize your device using a tripod and using your camera’s timer. You don’t need a fancy tripod, setting your DSLR on a stable surface works, propping your smartphone against a stable object works too.
- NOTE: Do not stand between your light source and your product when taking the photo. Figure out how to take your photo from an adjacent angle, or an aerial shot to create a birds-eye view or a “flat lay”
Step Five: Editing
- Edit your image for white balance and exposure. ALWAYS.
- Crop to straighten linear lines, FOR SURE.
- Always remember when editing LESS IS MORE. Please please don’t overdo it! You will want to look back on your photos as timeless pieces of your entrepreneurial journey. And, the more timeless they are, the more likely you will be able to repurpose your image even after years have passed.
- BE CONSISTENT. Take note of what editing treatments you’ve applied to your image, including filters and other adjustments and stick to it. Consistency is key when building a brand.
I hope these straight-to-the-point tips and tricks for taking product photos have been helpful. If you’d like to take a deeper dive, I have created this 30 page illustrated guide to help you in more detail, to shoot and edit your very own product photos, including how to create a background that is true white! Trust me, you are going to need this basic photo for every product. Here’s why!
Kelly xo