I have spent so much of my career shooting interiors. Beginning with my own home reno, and eventually working with renowned interior designers, architects, residential developers, and real estate agents. I am pleased to say that my interior photography has found its way into multiple publications, such as Dwell Magazine and most recently a residential quarterly with the acclaimed publication The Maritime Edit.
Photographing interiors has proven to be as enjoyable as it is inspiring. Each time I return from an interiors shoot, I feel a strong urge to move my sofa, freshen my greenery and switch out decorative accessories. Online, I am drawn to photos of interiors. I stop and study the photos on Instagram and Pinterest, deciding what it is that I like about each one, and of course double tapping and re-pinning.
Whether you are photographing interiors for your own personal enjoyment, to level-up your realty business, interior design business, photography portfolio, blog or DIY content, there are definitely things that you can do to create that same eye-catching appeal in your interiors photos. I will share these below:
1. Get to know the orientation of the sun
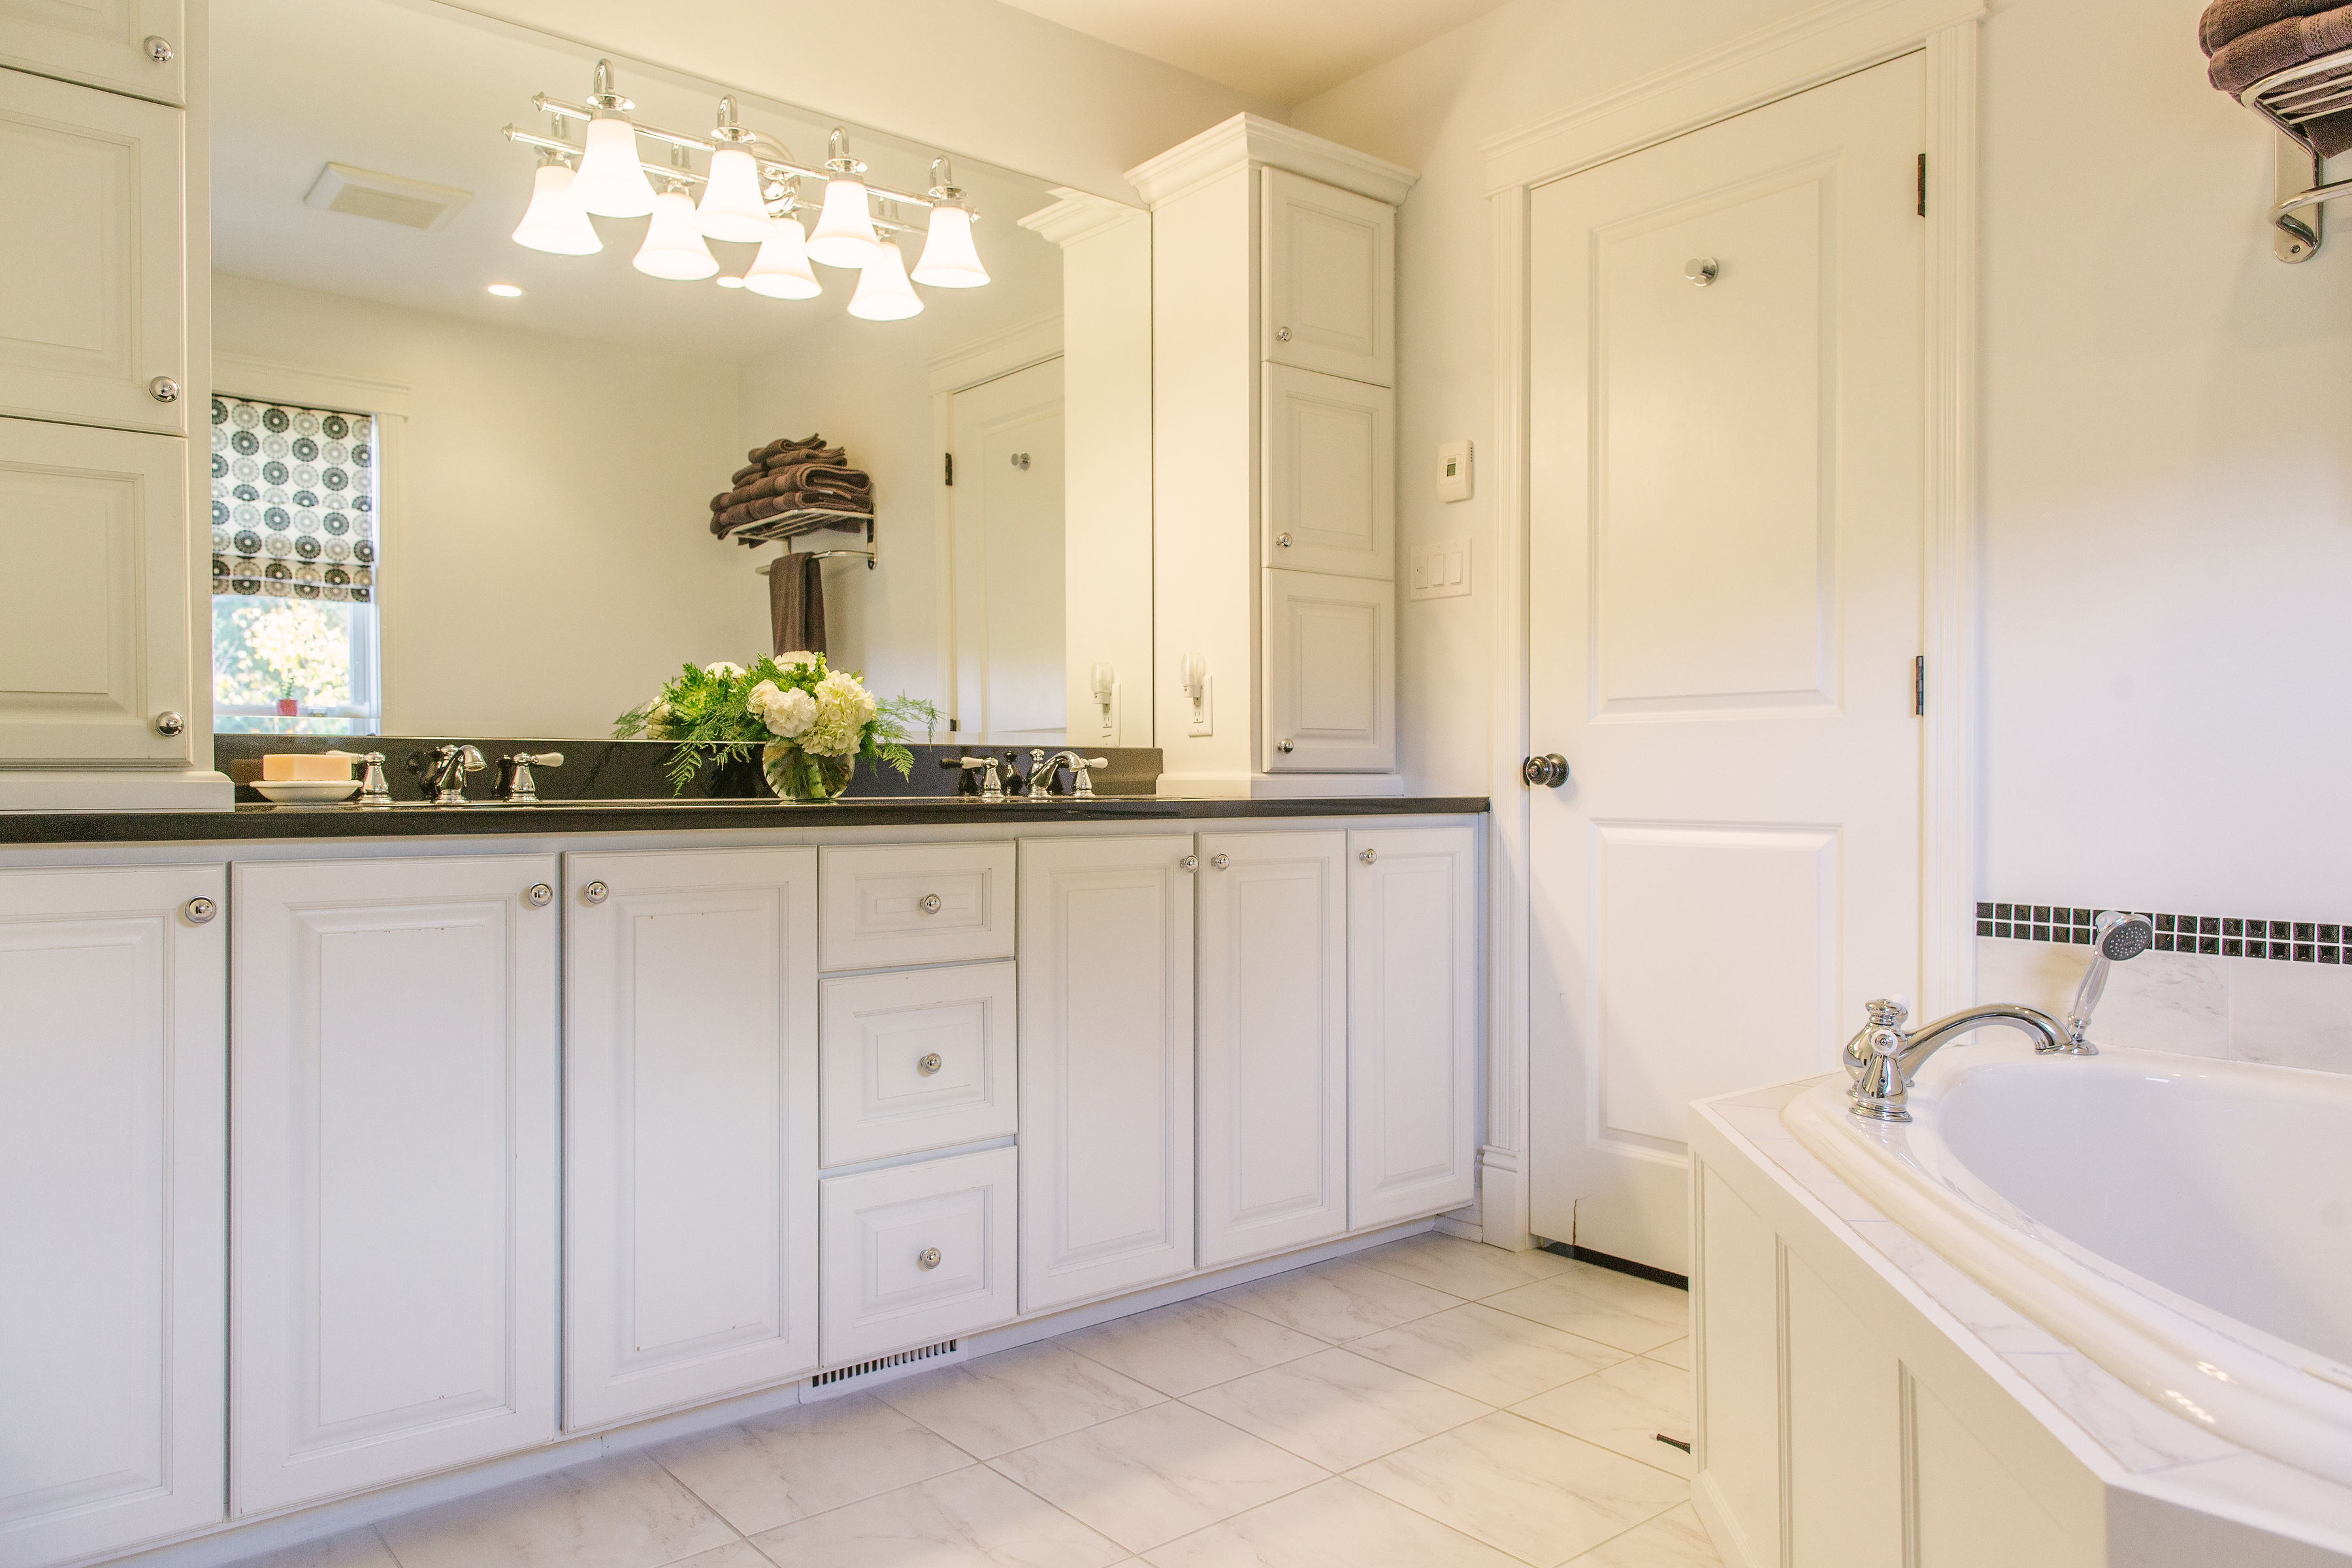
Direct sun can be a real challenge in interior photography. If you are heading out to shoot some interiors on a cloudy day, do a little happy dance because the cloud covering will eliminate your need to mind the sun. If it is going to be a sunny day, I would ask the homeowner what time of day the sun comes through the windows and avoid shooting at that time. In some circumstances, the direct sun simply can’t be avoided, and in these cases, make sure that you are not overexposing the areas where the direct sun is hitting. You can always brighten up the other areas in the frame afterwords using snapseed (mobile device users) or Lightroom (dslr camera users).
Notice the direct sun creeping into the bottom left corner of this image. Luckily, in this case, it isn’t too distracting.
2. Clean your lens before you shoot!
This isn’t necessarily specific to interior photos, you should clean your lens for any type of photo, but nonetheless, I believe it is important enough to mention here. I have added HOURS to my own workload because there was a tiny hair on my sensor that I wasn’t able to see with my naked eye or on my dslr screen. And the same goes for mobile device users! Giving the lens on the back of your phone a good cleaning before you get started can go a long way for the sharpness and clarity of your images! Add a lens cleaning to your workflow so it becomes a habit each and every time you shoot!

3. Steady your device
Motion blur is an extremely common mistake made by new photographers. For mobile device users, you can purchase a small tripod to sit your phone on, or if you are in a pinch, find a surface that you can rest your elbows on to steady your arms while holding the device. For dslr users, having a steady camera means that you can slow your shutter down to let in as much light as you need to without sacrificing the quality of your images by bumping up your ISO or widening your aperture. You can use your camera’s built in timer, or purchase a shutter remote for under $20.
4. Use natural light
Artificial lights – while beautiful inside of perfectly designed spaces – often cast colours (most are yellowish, but with the surge of LED lights, we see all kinds of colour casting now!). Whenever possible, flick the lights off. Natural light from the windows will keep your colours true to what they really are and your whites, white!
Note the yellowish colour cast coming from the sconce in this image.
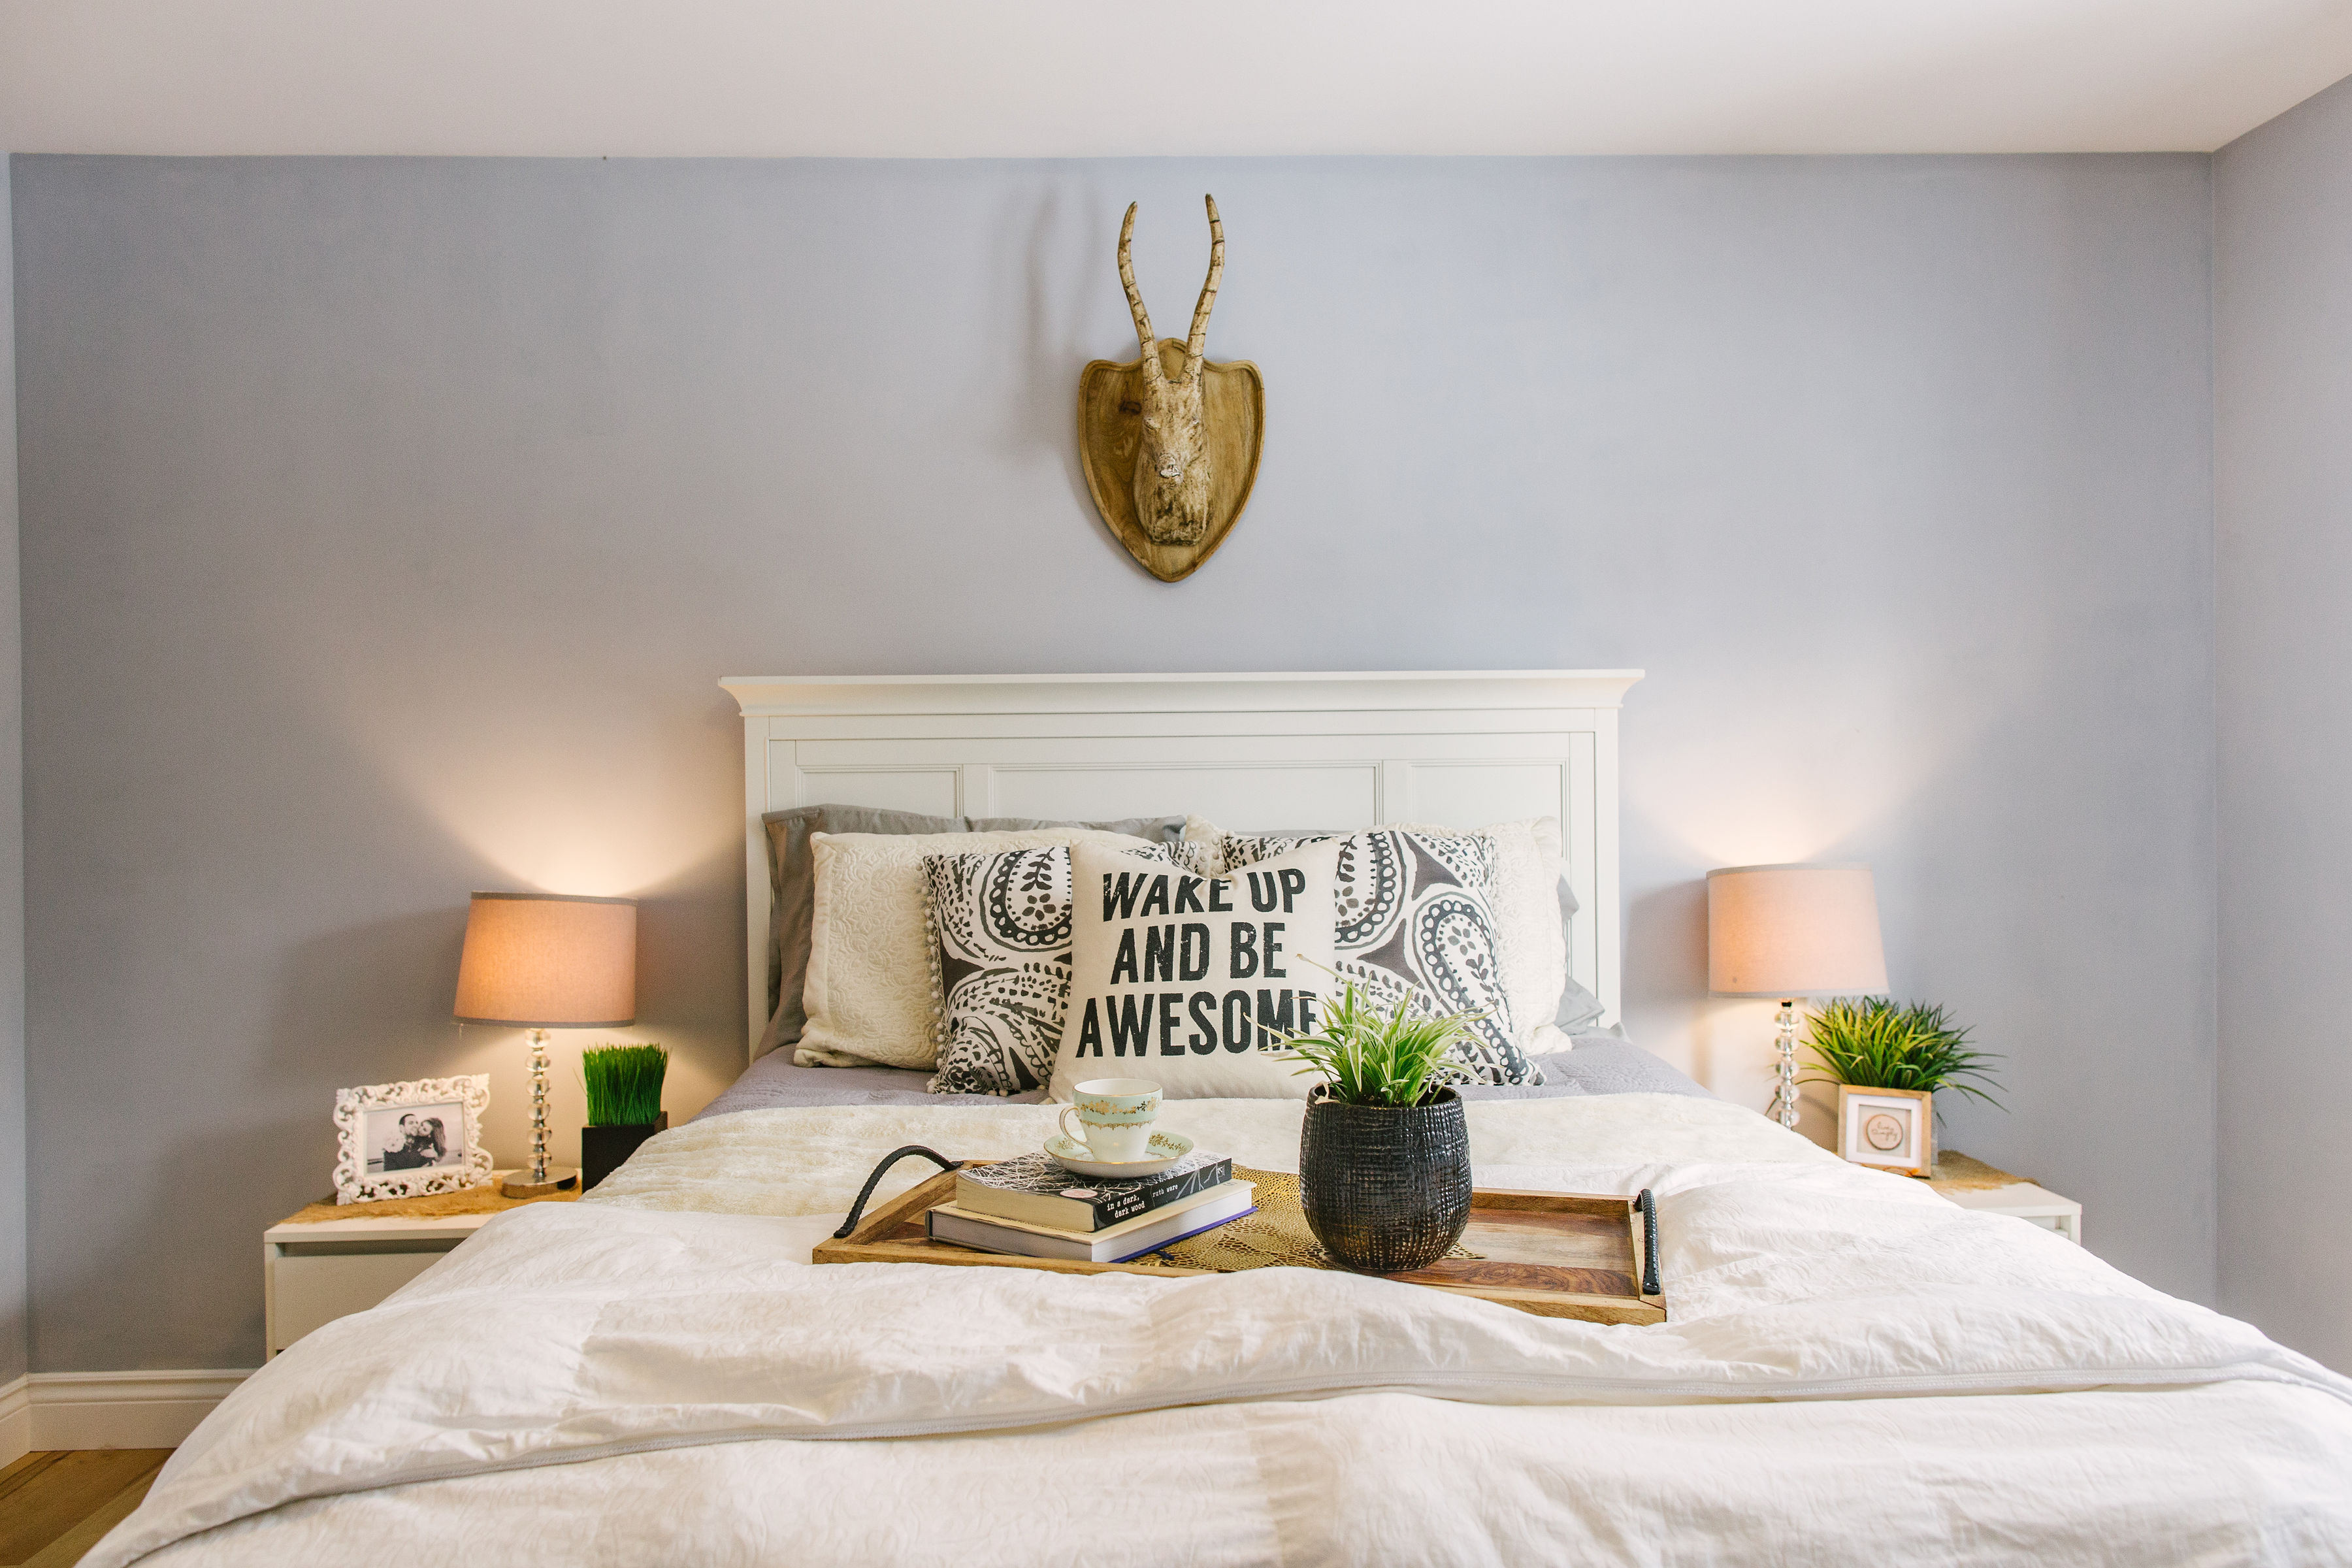
Notice the yellowish colour cast coming from the lamps in this photo. In this case I actually don’t mind it because it falls off quickly and there is a good natural light source (window) to the right that keeps the rest of this scene softly lit. Also, this “Wake Up” cushion from TUCK Studio makes up for absolutely everything anyway, if you ask me. 😛
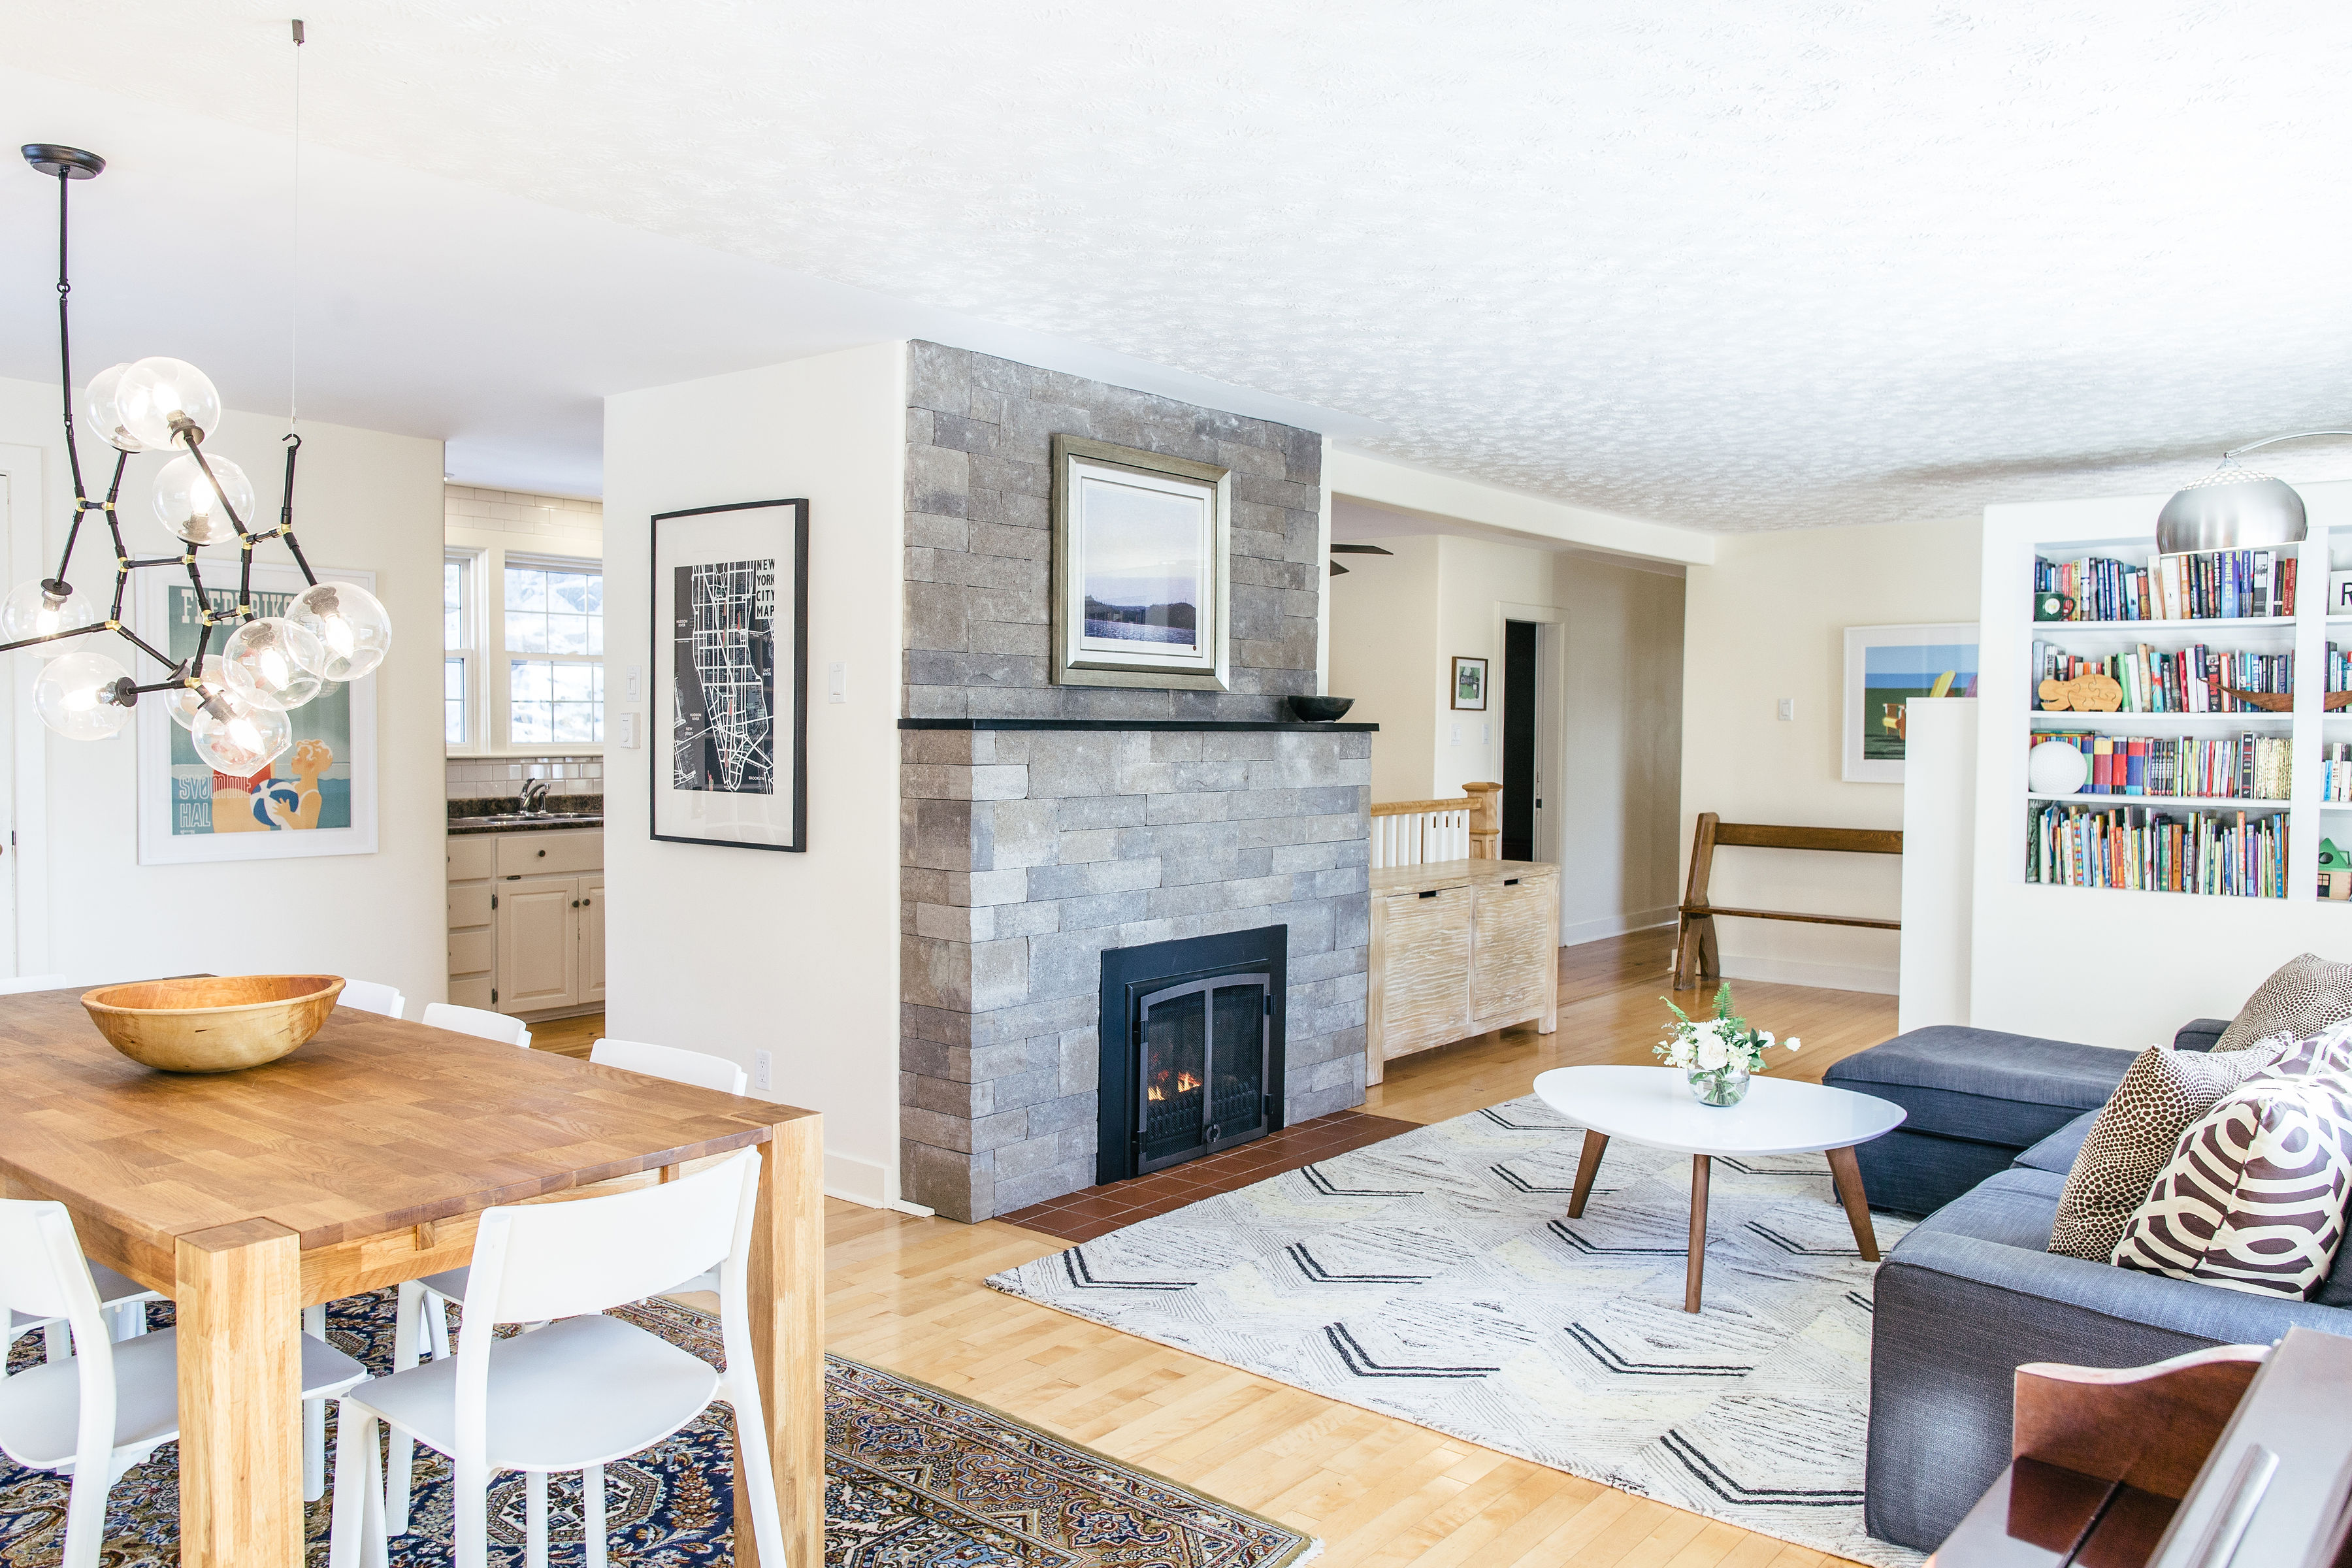
5. Mind your linear lines
Interiors are full of linear lines: furniture legs, table edges, cupboards, countertops, fireplaces, wall corners, windows, where walls meet ceilings etc. When these linear lines are not at straight angles, it throws off the composition of the image. Try your best to align these linear thresholds at right angles when you are taking the photo, or, correct the tilt in post-processing if needed.
This is my bestie’s house and by far my favourite residential photo subject. Just look at the repetition of all these delicious right-angles. Yummmm.
6. Watch for “blocks” in the frame
Blocks in the frame can be the back of a piece of furniture, a large lamp or plant. Sometimes these elements can prevent the eye from traveling through the image. When possible, move items that create a block in your frame, or change your angle so that the placement of such items isn’t central to your image.
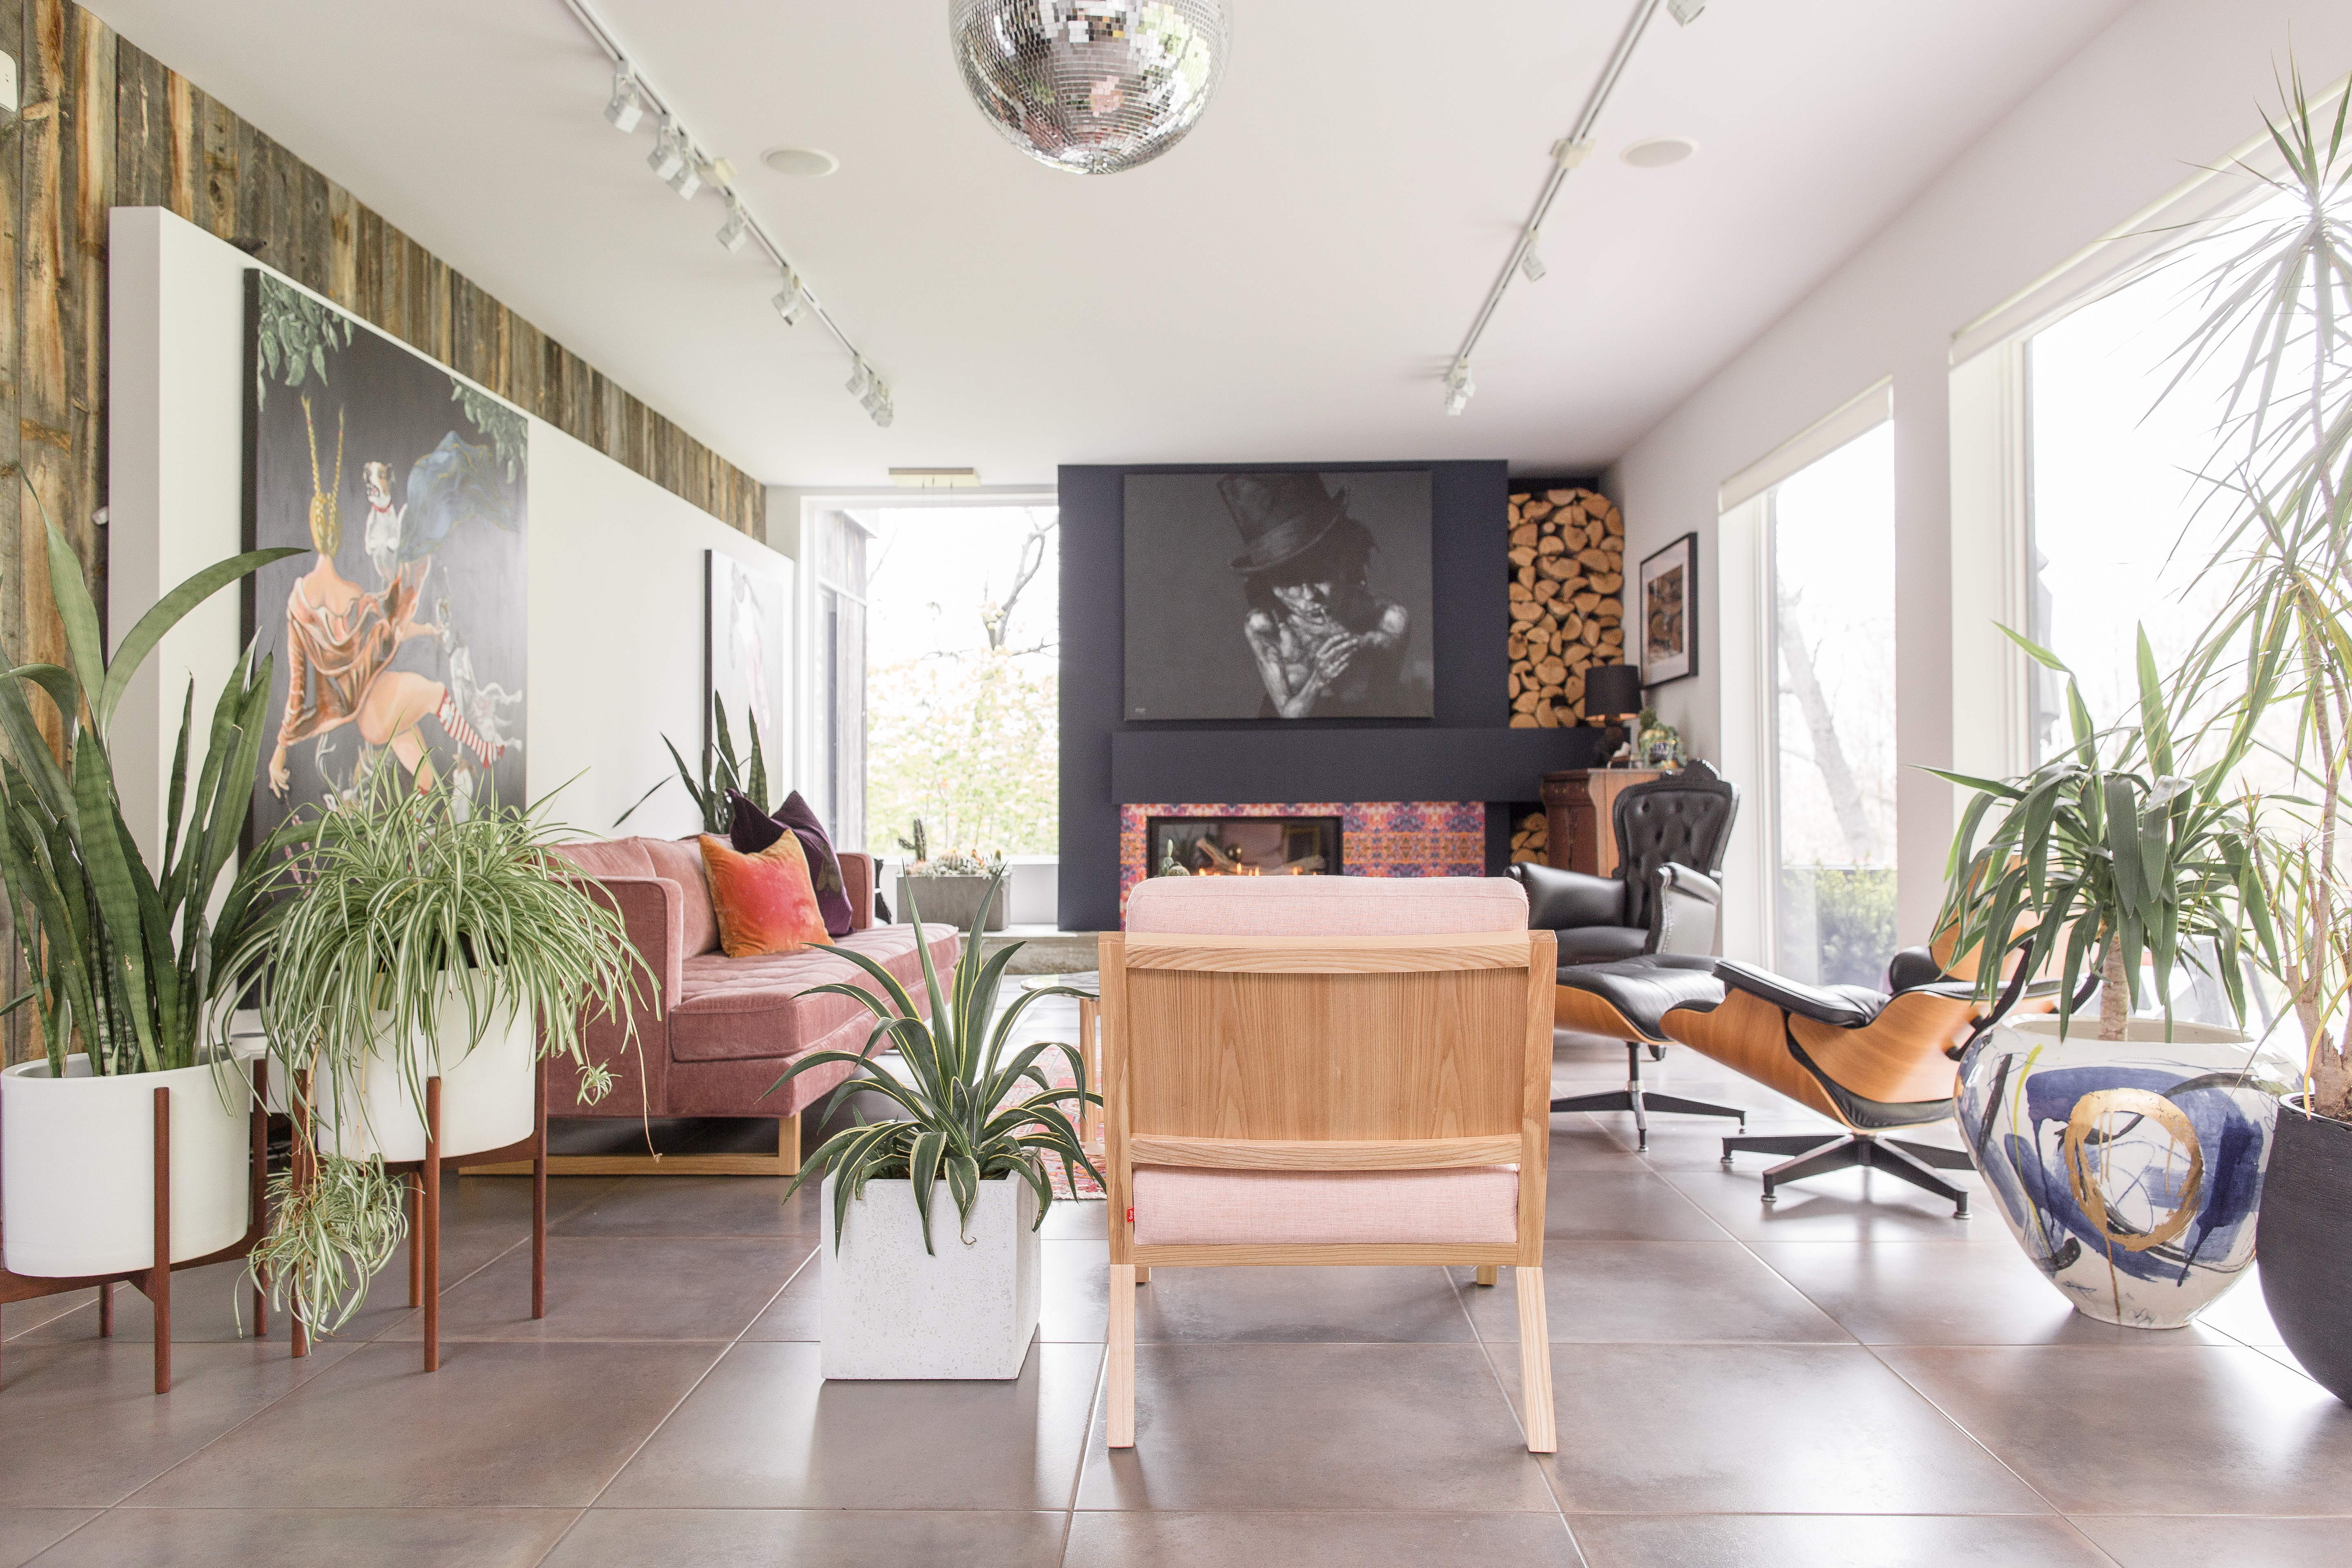
Notice how the back of the chair commands the attention of this photo.
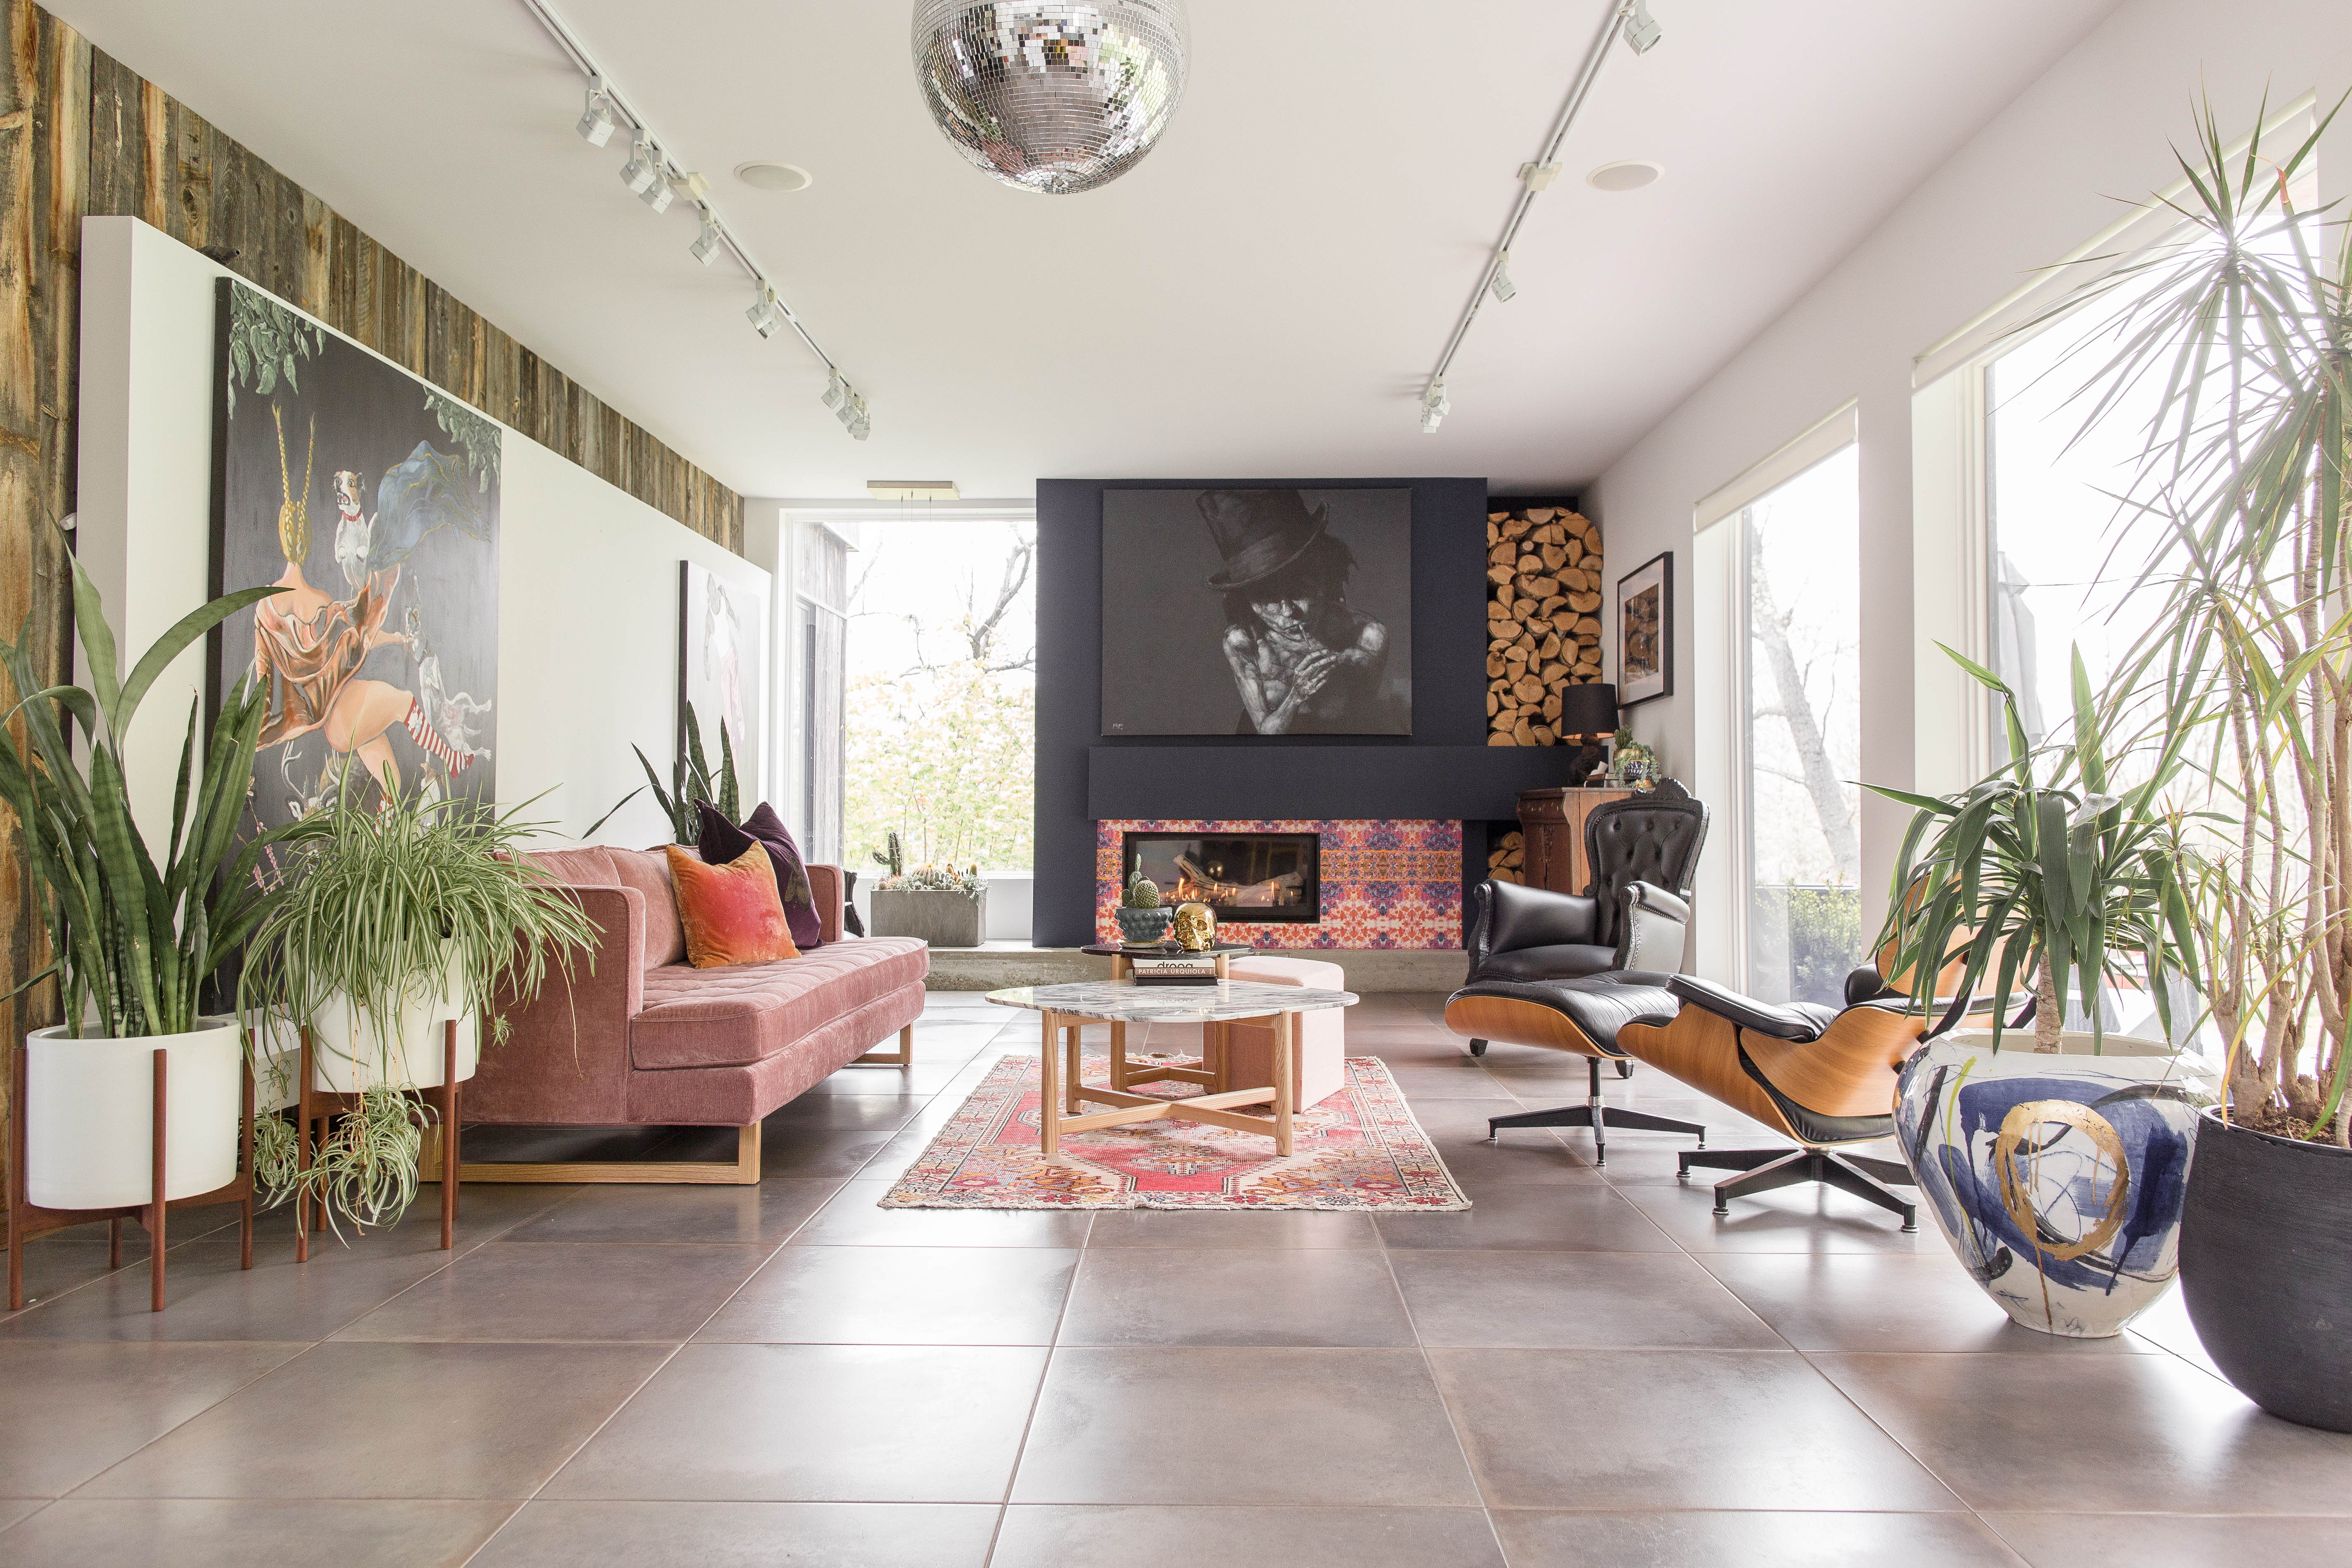
Ahhh. That’s better. With the chair removed, the eye is free to travel throughout this image.
I really hope these tips help you to create the interiors photos that you’ve been dreaming of! If I could encourage you to do just one thing after reading this post it would be to take a page from Nike, and “just do it.” Even if it is tough and everything feels wrong as you are starting out, the sooner you start, the sooner you will learn and get better! Also, if you are looking to take these tips a step further, download my free Interiors Photography Guide by clicking on the image below!
>> DOWNLOAD MY FREE INTERIORS PHOTOGRAPHY GUIDE NOW <<